Blog Archive

Related Posts Plugin for WordPress, Blogger...

11.13.2015

Some updates from me :)


Hi everybody!! It's been quite a long while since the last post! I haven't forgotten about this blog or my dream :) I was actually busy being a new mom of my precious little angel!!! There was also a period of illness and confusion about my life and future, and I was lost in darkness for quite some time. But I'm mostly recovered from them, thanks to God, and would like to refuel my passion! This time though, is not for myself, but for the LORD. After a recent Bible study called "Restless: Because you are made for more" by Jennie Allen, I found myself understanding my purpose in life a lot more, with a clearer direction for my life. Now, I would just want to jump right in and run the race for the purpose God showed me!

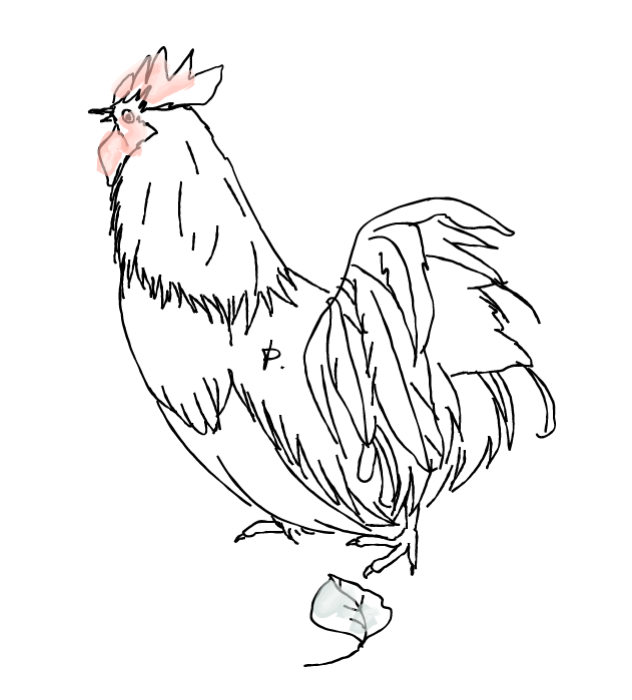
Something I did last year: a Facebook fan page was created and I mostly publish my posts there from then on :) The one below is a commission illustration of a fellow Fiat driver from a Fiat dealership where I bought my Fiat! :D


A pic of my happy diapering boy for my Facebook fan page:


A pic of my angel who loved doing this after turning 6 months!!


My teething cutie!!!


Thank you so much for reading my blog!! <3 <3 <3


5.15.2013

How to Change Blogger Pages Font Style/Color


I just found that I can change the font style/color of the PAGES tabs in Blogger in just one simple step!! :D


Go to Template on the left > click Customize > Add CSS


Copy and paste the following inside the box on the right:


.PageList li a {
font-weight: bold;
color: #6BBAB2;
}


You may change the color code, and add different styles in this simple CSS coding :D Hope that helped (a little)!

5.04.2013

Custom Adobe Illustrator Brush Experiment II


I just noticed that I can set 'pressure' in the art brush I made from the last post (silly me)! 

Below:
I used a little pressure on the random sketch on the left, and a little more pressure on the right profile head (notice the chin). I think the wrinkles of the brush make the line look organic. It's fun and I don't have to worry about shaky lines coming from my shaky hand with this brush!! :D


5.03.2013

Custom Adobe Illustrator Brush Test (with Free Brush) :D


Made a random sketch of a character I made long time ago, and used it for a custom brush made recently. I think it looks kind of like ink. 
Kind of :)


I followed the tutorial here from Steps 11 - 13 to make the brush, then modified it by cutting both ends with the knife tool to make it not tapered, because I don't like the ends of the line not linking to each other. And I followed Step 14 to make the art brush in the end.


My Brush (not tapered)

After cutting the two ends, the line on the face looks seamless :D

Another brush made without cutting both ends and more wrinkled.

Feel free to use my brush if you like! :D Use it wherever you like, but I would appreciate it if you can show me the illustration/graphics you made with my brush!

4.19.2013

Adobe Illustrator Brush Test


Ever since I started using Adobe Illustrator, I haven't really tried to use the brush sets because I always think that they look very fake. However, recently, because I want to submit some illustrations to a stock illustration site, and they need vector illustrations more, so I tried to see if I can achieve that hand-drawn feeling with AI.


Here's my first quick experiment with the Artistic_ChalkCharcoalPencil Brushes. I like the look of the 'Pencil thick' brush:


Applied it to the Noel illustration I drew with the Pen tool (P). 


Filled the illustration with color like usual.

With color on the background:


It's fun to use, but I'm not very satisfied with the outcome. I'll try to see if I can make a custom brush that can achieve what I want :)


4.05.2013

Church Website Go Live :D


After all these months, the church website has finally gone live!!! Yay!!! \ (>w<) /

http://mpcac.org/pc


As some information on the website needed to be confirmed before going live, the site just sat there and waited and waited, until last month, our pastor said, "let's not wait any longer and upload it" :p.


I changed the church title on the top left corner and took off the "30th Anniversary" banner, added a "Chinese version" tab, changed the slide for the theme of this year, and some corresponding changes back end. I think it looked better than before :) I still want to find a font with both upper and lower case that looks like the Bebas font though, because Bebas is in all caps and it's difficult for the audience to read content in all caps.


For the Chinese version, I looked into the language switcher function in Joomla, thinking it could help make the site bilingual a lot easier, but I really don't like the flags >><< they use to switch the language (the Traditional Chinese flag doesn't even show), and as I understand, there's no customization you can do for the graphics or location you can put. (With the help of extensions like United Language Switcher , I could put all the flags in one dropdown menu, but still, I don't like having flags there! Please let me know if there IS a way to use my own graphics with the language switcher!!! I'd love to give it a try!!)


Anyway, I resolved to just create another database, restored the backup of the original English site (I highly recommend Akeeba Backup!!!!), and changed the text inside into Chinese, which means there are actually TWO separate sites, instead of one (just like what we have right now). I think this way, not only can I skip creating all the menus and sub-menus again, it can also make the design and organization of content a lot more flexible, especially when the English ministry might have different content to use in the future, and the Chinese version might not necessarily need those content.

I guess the down side of this solution would be an almost duplicated site LOL, and I can't switch language on the same page. When people click the "Chinese version" tab, it will just open a new window of the Chinese website.

That's all for now :D When the Chinese version is finished, I'll post an update again! Thanks for stopping by!!

3.05.2013

For a Facebook Page :)


I've been hoping to open a personal Facebook page for some time after reading the consulting post from A Girl Who Creates :) However, since the new addition to our family, I haven't been able to really be very productive...BUT, every now and then, when I'm not taking care of/playing with my little kitty Noel, I'd try to make tiny progress to the Facebook page, namely the FB page banner :)))

In my mind, I know I can just take any illustrations I drew before to make the banner and quickly start the FB page, but my stubborn perfectionist heart just wouldn't let me, as it doesn't match with the little girl picture :p (although it was drawn over two years ago :p but I still love it as I so want to do more freehand drawing after spending 8+ years using AI to draw all the time!) So, below are some of the experiments I've been working on :) It's so much fun to play with different color combinations and patterns! :D And the style is more geared to a hand-drawn feeling as I progress (newest design on top, click the image for details). I still haven't decided on which one to use yet, and I may still add in new designs before finalizing it :) Your comments are most certainly welcome!!


Some color combinations that I'm liking at this moment :p

These are some of the colors that popped up in my mind one night when I was about to sleep, and I quickly hopped off the bed and put them in my iPad (so please excuse my very ugly handwriting and graphics :p) The Christmas palette tells you it was something made back in December...:p


Although my progress is slow, I'll still try to make some baby steps on this journey to an illustration career :) Thanks for reading!!! :D

2.09.2013

My Kitten Noel :D


I feel so guilty for not updating this blog for 2 months! Something special happened: we adopted a kitten (well, it's more like she adopted us :p)!!! We found a shivering, tiny little thing meowing and sitting in the corner of our patio on a rainy December afternoon. I actually heard the meowing all morning long but couldn't find her, and finally my hubby found her after he got home!!! :D Because we found her in December and it's close to Christmas, we named her "Noel". We both think she's a gift from God :D Then, we've been busy taking care of this little fur ball ever since :)))) (I wouldn't expect how much work it is to take care of a baby kitten!!!)

Here are some of the pictures of my dearest baby :D


11.21.2012

Church Anniversary Book Finished!!! :D


Some layouts and art elements I made at the very beginning in the brainstorming stage (they look too dark for the occasion, or too bright for the elderly to read the text).


Some screenshots of the work-in-progress layouts. Peaceful, calm, feel like home, comfortable, simple, clean...these are the keywords I have in mind when I was designing the layout, so I used a neutral/muted palette:


And I accidentally noticed one extremely beautiful thing in InDesign...


...the missing font highlight color!!! The color look soooooo pretty and it was a love at first sight!! At first, I didn't know the highlighted part means the font is missing there, and I tried to use the eye-dropper to sample the color (silly me). Well, but it's really very pretty, so I tried to google what color that is but in vain (sigh). I then tried to match that color myself and used that in the book :p Apparently, it's hard to make that same color with CMYK :p

Final Book Cover:

A more lively cover with a wheat field, symbolizing hope and the plentiful harvest mentioned in the Bible. It also matches with the wheat field in the website :) I tried to keep the layout clean.

Due to privacy issues, I can't share more of the inside here, but I'm glad that, with God's grace, I was able to finally put them all together and finished the 52-page book in a week!

11.12.2012

Random Stuff


:p Did some random fun stuff while designing the anniversary book:

3-in-1 God

11.09.2012

30th Anniversary Book for Church


So I'm almost done with the website (that's actually last week's news :p)! After spending a lot of time fine tuning a lot of things on the layout that people might not even notice, I'm finally moving on to the 30th Anniversary Book for the church.

(A little more on the fine-tuning, I learned that there are actually a lot of Nivo Sliders out there, so I finally understand why the tech support of Unite Nivo Slider told me the one I have in the template is not their Nivo Slider...:p Also, I found that I can add shadow to objects in the CSS file!!! I didn't know that kind of thing even existed :D <--- such a newbie. The code of box shadow I used:

box-shadow: 0px 1px 5px 0px #4A4A4A;

Notice the tiny little shadow around the box:


I also found that I can load a module within an article! It's like a miracle to me! This link shows you exactly how to do that!)

Back to the topic :p Before working on anything, we had to figure out the size of the book and contact the printing company for a quote. Because we are not printing a large quantity, with a limited budget, it's a little difficult to achieve the outcome I have in mind. What I wanted to do is to have perfect binding for the books, with a landscape or square layout (though it's kind of a waste of paper :p...but it looks so much better...).

After negotiating with the size, binding and pricing for a whole week, we seem to not have reached any conclusion. HOWEVER, we need the book published on/before Nov 23! And I still haven't worked on the layout yet because of the size still not determined! :( I really think that I wasted a lot of time this week, in which the time could be used to work on something more productive, like working on my stock illustrations :( Sorry, Tim :(

10.30.2012

A little progress for the site :D


I was finally able to fix the slider problem of the template! Thank God!!!!!!!!!!!!!!!

Originally, the slider cannot load the first slide and only shows the little loading circle.


I tried to contact the template provider but no reply received. Somehow I figured out from the codes that the slider was originally from Nivo Slider, so I tried to use the Unite Nivo Slider extension in the Joomla site, but it just didn't show with the same background with slanted lines in the template :((( The first slide, however, was able to show without a problem. Then I contacted Unite Nivo Slider, but they were not able to fix that issue for me, because the slider was not appeared as a module in the website :( The slider was hard-coded inside the template.

BUT, they did give me a piece of very useful information: the Unite Nivo Slider only works WITH a position! That sounds obvious but that helped a lot!!! As I mentioned before the template has very limited positions, and I suddenly remember I saw some information a little while ago saying how to create a position in a template by myself! So I tried to create a new position in the template where the original showcase position was, with the extremely simple steps from this website, and put the Unite Nivo Slider inside! Voila! The slider appeared with the slanted lines background in the original template!

I'm ready to move on to the next thing on my to-do list: the floating banner!! Hope that I can also fix the drop-down menu issue as well!

UPDATE!

Got the floating banner working on the home page and the drop-down menu fixed!! I can't believe how simple it is to 'fix' the drop-down menu!! There is no problem at all with the original template, and the only thing I have to do to show the sub-menu properly is to click "Yes" in the "Show Sub-menu Items" under your menu module in Module Manager!!! Thank God again!!


10.24.2012

Church Website Progress


Before I started this blog, I was actually working on the website for my church, MPCAC (Metro-Phoenix Chinese Alliance Church) :D This is the very first time for me to build a website using Joomla, a Content Management System (CMS), in order to let our pastor and staff update information on the web more easily.

The installation part of Joomla was a breeze with the help of many useful Joomla tutorials on the web such as the videos from Joomla Direct. Using Joomla 2.5 is also not as difficult as I thought with the help of this super informative and simple video tutorial from CloudAccess.

However, as I know almost nothing about coding, I started out choosing a template from globbersthemes and started modifying the graphics inside bit by bit. The templates designed by Globbers are simply amazing and got the style I'm looking for, but the module positions of the template are very limited, and there's no documentation on the positions at all :(  I spent hours trying to figure out which codes to use to modify certain things and fix little bugs inside (still one bug haven't fixed). But still, I love Globber's template design, and they're not expensive at all (or free for lower Joomla versions)! 

Despite the occasional obstacles and doubts, getting the final approval from our pastor and being able to see the website on the live site gives me peace! It works out after all! Thank God!! :D

Here's a sneak peek of the site:


Will update on the progress of the site later! :D


10.18.2012

Welcome to my petite blog!


Hello everyone!

This is a blog dedicated to documenting my pursuit of an illustration and design career, which I always wanted in my life! It's a thought inspired by Holli Conger, the author of the blog 'A Girl Who Creates'! :D

I'll also share my thoughts, my art, probably some tutorials and everything I love here! I would also like to connect with more friends in the illustration and art licensing field with this blog. :D

You may take a look at my illustration+design portfolio here or here! I do have an old, old blog that is in Chinese :p You may find quite a few interesting vector drawing processes inside while I was contributing my comics to a Christian newspaper called Herald Monthly :) Hope you'll enjoy your stay here! :D

Love,
Peggy